|
Tyranid Conversions - Extended Carapace
I tried a lot of different methods, so take a look. The first
one is the slowest and the third one is the fastest.
|
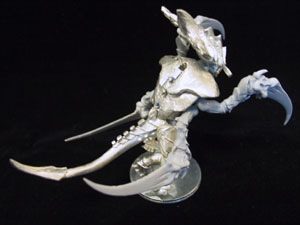
Flying Hive Tyrant (all
pinned)
Materials
- 1 Flying Hive Tyrant
- 5 Flat Extended Carapace Biomorphs from the Monstrous Creature
Sprues (1 per sprue)
- Pinning supplies
- Epoxy Resin Putty
- 5-minute epoxy
- Cyanoacrylate glue
Procedure
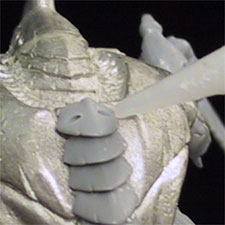
- Clip off the knobs on the back.
- Place a strip of double stick tape on along the back and
play around with placing the plates until you are comfortable
with how they will finally be oriented.
- Pin the regions between and above the trimmed knobs.
- Test out the pin lengths and trim them down until the plates
can sit properly.
- Glue the pins in place with 5-minute epoxy.
- Starting with the bottom, place a drop or two of cyanoacrylate
glue and a little bit of putty around the pin and, place a
dab of glue on top of the putty, and press the plate into
place.
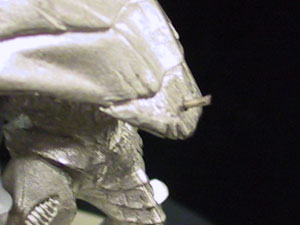
- Once you are sure of the final position, you can dab a little
superglue at the plate edges at the sides of the plates, where
the plate meets the back (see the
Carnifex pictures farther down this page for more detail)
. Capillary action should suck it in between the two plate
and back.
- Work your way up the back in the same fashion.
- Note: I followed the angle of the back, which left a gap
between second and third plates from the bottom. There is
a reason. I plan to put an Adrenal Gland
biomorph there.
- For extra stability, you can use a fine tip plastic cement
applicator, like Faller Expert, to squirt a little plastic
cement under the plates, provided there is room. This can
help finish the appearance that the plates are held down by
fleshy bits.
- Done!
Hindsight
- The putty was OK, but probably not necessary. Simply pinning
the bottom plate would have been adequate, combined with
cyanoacrylate glue at the side edges.
- Always prep a few extra plates in advance just in case
you use more. This time I was OK, but in the future...
|
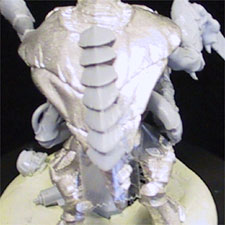
Carnifex - Take 1 (1 pin)
Aside from maybe a plate on the back of its waist, which would
be out of sight and somewhat awkard, the only choice I was happy
with was a strip of plates down the back.
Materials
Procedure
- Place a strip of double stick tape on along the back and
play around with placing the plates until you are comfortable
with how they will finally be oriented.
- Insert a pin at the base of the back where the first plate
will go.
- Drill an appropriate hole in the plate. Be careful, it's
thin!
- Test out the pin length. Trim it down and bend it until
the plate can sit properly.
- Place a drop or two of cyanoacrylate glue on the pin and
press the plate into place.
- Manipulate the plate until the position is correct, then
dab some superglue at the side edges (see
below for a precise picture).
- Now we will build up stepwise.
- First place a drop of plastic cement on the very top tip
of the plate.
- Add the next plate.
- Wait a few seconds for the glue to start curing (depending
on your glue).
- Position the plate properly, being sure to check angle as
well as rotation.
- Once you are sure of the final position, you can dab a little
superglue at the plate edges at the sides of the plates, where
the plate meets the back. Capillary action should suck it
in between the two plate side edges and the Carnifex's back.
- Work your way up the back in the same fashion.
- For extra stability, you can use a fine tip plastic cement
applicator, like Faller Expert, to squirt a little plastic
cement under the plates, provided there is room. This can
help finish the appearance that the plates are held down by
fleshy bits. I especially did this on the topmost plate. Putty
might be a better choice; you'll have to use your own judgement
on that.
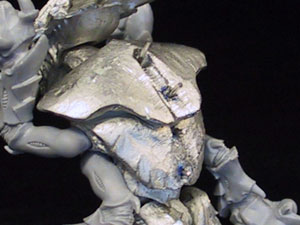
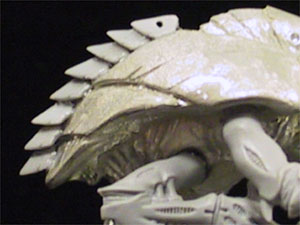
The Results
I put some battle damage on the plates. This shot shows a
hole that I very carefully drilled through sideways
to represent the ubiquitous Lascannon shots that my poor Cranifex
suffers.
Hindsight
- Drawing a line along the center of the back to help alignment
of the plates might have been useful.
|
Carnifex - Take 2 (0 pins)
Here I just used 5-minute epoxy for everything. No pins.
Materials
- 1 Carnifex
- 7 Flat Extended Carapace Biomorphs from the Gaunt Sprues
(1 per sprue)
- 5-minute epoxy
Procedure
- Place a strip of double stick tape on along the back and
play around with placing the plates until you are comfortable
with how they will finally be oriented.
- Positioning the model securely so that it is tilting forward
at about 45 degrees might help with the stability of the
plates as the glue sets.
- Mix up 5-minute epoxy, start gluing from the bottom up.
- Adjust frantically until the glue initially sets.
The Results
Almost identical to the previous Carnifex.
|
|