Procedure
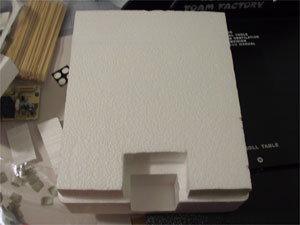
1. Start with pieces of foam that are close enough to the size
and shape you want that modifications will be minimal, preferably
just chopping some pieces off. Make a plan. My plan is to use the
piece at left as the base and the piece at right as a second, stepped
layer. The scraps will then be used creatively to finish the top.
2. I trimmed down the top piece and cut out a space.
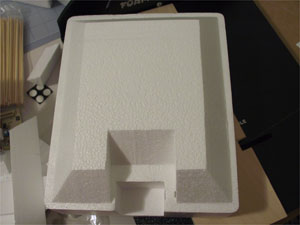
3. Then I set the scroll cutter to about a 45 degree angle and
beveled the edges of the upper piece, including the inset, which
I decided now would hold a ramp upon which I would mount stairs.
4. I then trimmed the lower piece to match the slope that would
eventually hold a stairway. I also played around with the scraps
and trimmed them until they looked interesting. On a side note:
the short walls also make the top of the terrain piece tactically
useful for cover from shooting attacks. :)
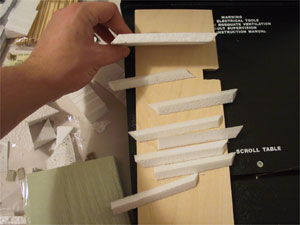
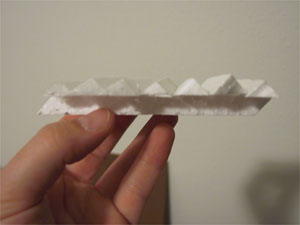
5. Now to build the stairs. Rather than trying to cut a stairway
in, my plan was to mount strips with a triangular cross-section
to a flat ramp and then put that into place. First, I cut a base
support ramp, then I cut more of the scrap from the upper level
into blocks and shaved the corner edges off the blocks, creating
strips to serve as stairs.
6. I tested it out to see if looked all right (always a good idea,
though I often get carried away and forget).
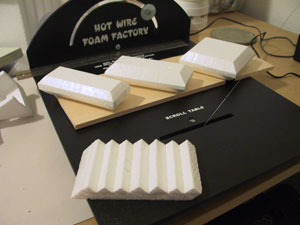
7. I then glued the strips down and trimmed the edges to match
the ramp. In the backdrop you can see the nifty little shapes remaining
from the trimming as well as the miraculous tool that is a hot
wire scroll table. :)
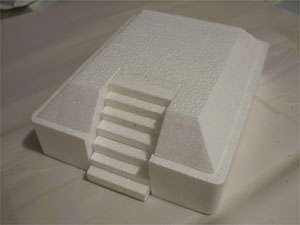
8. Using 5-minute epoxy, I glued the ramp to the top surface first.
This was so that I could make sure the top portion was properly
aligned; my feeling was that it would be the most obvious place
to spot a mistake. Once that had cured slightly, I glued the top
onto the bottom piece, this way, if the steps were horribly misaligned
with the bottom piece, I could still tweak the position slightly.
After the epoxy cured, I was basically finished with the hard part
of the construction.
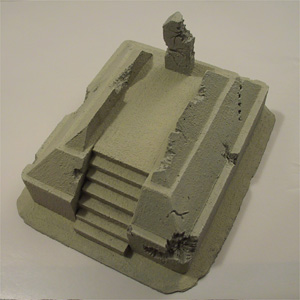
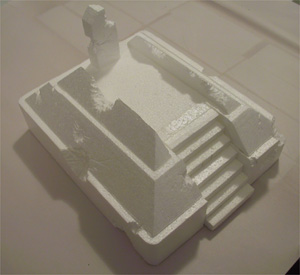
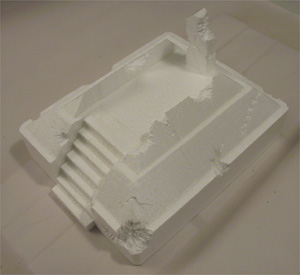
9. The fun doesn't stop there! I put the top pieces on and put
in some battle damage. How did I do the damage you ask?
- Explosive blast: I tore out a roughly round piece with my fingernails,
then I used the Foam Factory engraving tool to scratch/cut out
from the center in rough streaks to create the appearance of
a central blast area. I trailed a few fracture lines off from
the edges to help support the illusion of stone.
- Stream of bullet holes: I jabbed the engraving tool direclty
in then roughed up the edges of the holes.
 |
 |
10. I slightly thinned some texture paint and painted the whole
piece with it, using a 1" brush. Once that had dried, I painted
the entire piece with Delta Ceramcoat Mudstone. After that dried,
I painted all but the deep recessed areas with Delta Ceramcoat
Sandstone. After that dried, I highlighted with Delta Ceramcoat
Antique White. The final result looks pretty natural and stony.
I was worried the simple paint scheme would generate cartoonish
highlights, but it did not. Note: for some of the dry brushing
I used smaller paint brushes at random, as the detail demanded;
large brushes can create harsh and unnaturally aligned highlights
on small objects.
11. More to come... |