|
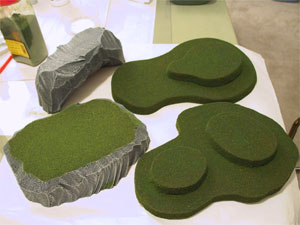
Hills, the ubiquitous terrain of miniatures wargaming. Here I show how
I made some hills from some simple and cheap (mostly free) materials.
These hills are designed with two uses in mind: as props for role-playing
games and terrain for miniatures warfare games, such as Games Workshop's
Sci-Fi minis game, Warhammer 40,000 (WH40k), and their Fantasy minis
game, Warhammer.
Philosophical point: I believe terrain should be tactically significant,
so hills are tall enough to provide a significant vantage point and/or
provide cover for a human being. Shallow sloping hills look nice, but
that's scenery not terrain, and I'm not playing with trains here, I'm
playing with toy soldiers! :)
WARNING: You should not attempt these procedures without an adult present.
Materials for Building Hills
Before making hills, you should review the types of foam.
I made two basic types of hills - standard and
asteroid/lava.
Standard Hills
Materials
- Pieces of foam
- Hot wire scroll
table and scroll cutter
- White glue (a.k.a. PVA glue, a.k.a. Elmer's Glue) and/or Elmer's
Craft Bond (spray glue)
- Appropriate flock (I used mostly Woodland Scenics "Green
Blend" Blended Turf)
- Large paint brush (1" wide head)
- Behr Premium Plus Flat Finish - Custom Color match from Delta
Ceramcoat Storm Grey*
- Behr Premium Plus Flat Finish - Custom Color match from Delta
Ceramcoat Dark Brown*
- Craft paints (for highlighting and small stuff)
- Delta Ceramcoat Rain Grey
- Delta Ceramcoat Quaker Grey
* - I just took the bottles to Home Depot's paint area and they
mixed up a quart of each color in ten minutes and it only cost
$9 per quart!
|
Procedure
1. Mark and cut out the uppermost tier of the hill. Mark out
and cut the next tier down and so on. I chose to make mostly two-tier
hills (2 levels, ~1" high each) and a few three tier hills.
One tier is not really tactically significant, so I don't bother
with it.
2. Types of Faces/slopes
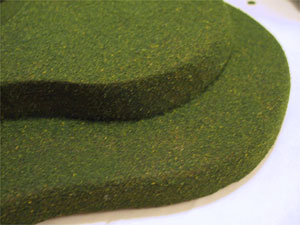
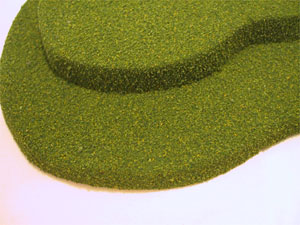
- Grassy, contour lines: I like this for its tactical feel, as
military maps are drawn with a contour line approach. The ideal
approach is with a sandable foam, though, as slightly rounding
the top edges will dramatically improve the adhesion of flock.
|
|
|
|
|
|
| Sharp edge (more flock on bottom
picture) |
Rounded Edge (more flock on bottom
picture) |
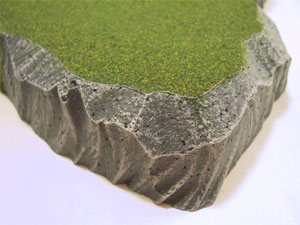
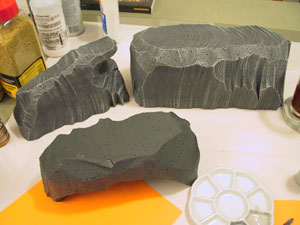
- Rocky: If you want a rocky hill then be sure to make exrta
cuts on the appopriate faces with your hot wire to give plenty
of sharp edges to highlight later. Note that I cut across the
top of the foam to create a flat textured surface instead of
leaving the original flat foam surface.
- Gentle, grassy slope: If you are going for a grassy hill, you
might want to go for a gentle slope or no slope at all.
| I did not make any of these yet,
but maybe someday soon. Basically, the standard GW
slopes are like this. |
- Hybrid rocky/grassy: My hands down favorites.
3. So now you should have a bare piece of foam cut to the desired
shape and size. Put on the basecoat using latex paint. If you are
painting grey and brown, let one color dry before you paint the
other. I painted the grey on first, then the brown.
4.Paint the bottom of the piece. That's right, seal the whole
thing up. Let's make them last.
5. Highlight any rocky features with Delta Ceramcoat Rain Grey
and then Delta Ceramcoat Hippo Grey. Do both highlights, trust
me. It makes a big difference. With a little practice, you can
do this step with the 1" brush as well, which greatly speeds
things up. Be sure and rinse the brush after every one or two hills
to prevent damage to the brush. You will want to dry the water
from the brush pretty thoroughly before doing more dry brushing.
By the time you dry brush two hills, wash the brush, and dry the
brush, you can go right back to the same hills and do the second
highlight; it will be dry enough. Here's a before and after so
you can see the stark difference highlighting makes.
6. For hills with any grass on them, apply white glue to the spots
where you want flock (the brown areas).
7. Simply shake the flock onto the hill (hopefully you have a
drop cloth or paper beneath to catch the excess flock).
8. Tap the hill from the bottom to help tamp down the flock.
9. Let the glue/flock dry for at least an hour. Overnight is even
better.
10. Invert the hill and gently tap the bottom to free up excess
flock. For hybrid hills, you might find some flock sticking to
areas that were not painted with glue. Just use some canned air
to carefully blow that off.
11. I use a standardized sealing approach - 3 layers of gloss
followed by one layer of matte. For more detail see my page
on sealers. (Note: Because terrain is so big, I tried to save
money and tested Krylon Matte Finish instead of Testor's Dullcote,
but it was not matte enough. Stick with the Testor's Dullcote).
Additional Notes - Glue and Flock
You can paint on glue with brush-on white glue or slightly thinned
white glue (I use about 1 part water to 3 parts Elmer's Glue; any
thinner and it drips everywhere); I also tried Elmer's Craft Bond
spray-on adhesive. The later seemed to work very well. Here is
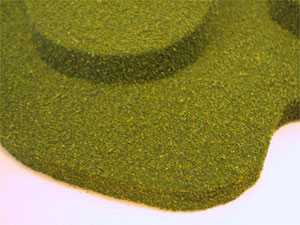
my first layer of flock, using 3:1 glue:water
|
|
|
|
Sharp edge, flock
sticks poorly to edge
|
Rounded edge, takes
flock better
|
After sealing and everything, I noticed that the hills looked
like they were balding. So I wanted to try another coat of flock.
Not wanting to try and paint glue on top of flock, I used Elmer
Craft Bond. It seemed to work quite well. Here is the result of
the second layer:
|
|
|
|
Sharp edge, flock
sticks poorly to edge
|
Rounded edge, takes
flock better
|
I still need to go back and try a single coat of flock with Elmer's
Craft Bond to assess if it does a better job.
|
Asteroid/Lava Hills
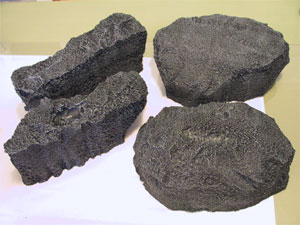
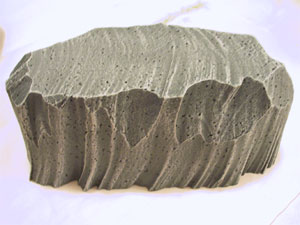
The solvents in standard spray paint eat styrofoam. Let's turn that
to our advantage!
Materials
- Pieces of foam
- Hot wire scroll
table and scroll cutter
- Large paint brush (1" wide head)
- White glue (a.k.a. PVA glue, a.k.a. Elmer's Glue) and/or Elmer's
Craft Bond (spray glue)
- Any black spray paint or primer that is non-latex
- Craft paints (for highlighting)
- Delta Ceramcoat Storm Grey
- Delta Ceramcoat Rain Grey Grey
|
Procedure
1. Because we will erode the styrofoam, I highly recommend cutting
your hill from a single piece, as the glue line between multiple
layers will create an irregular corrosion of the hill surface and
obvious artificial lines will show through.
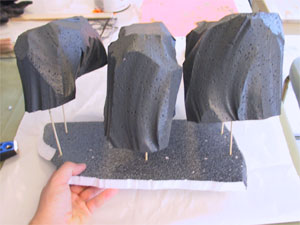
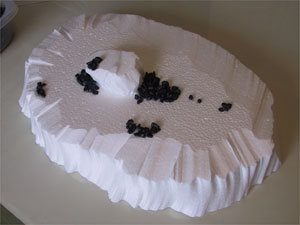 |
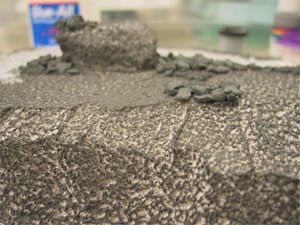
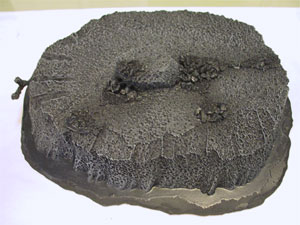
| This hill is a little more elaborate.
I want it to reflect a mineral vein eventually. I added large
rocks first, then smaller rocks, a strange coral-like branch
made from pipecleaner and a base (below). |
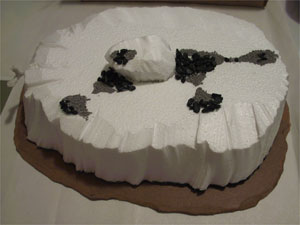 |
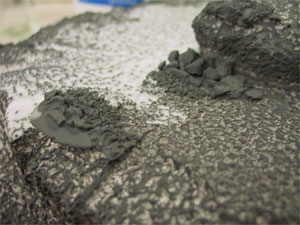
2. Spray paint on the surface to erode it in a controlled fashion.
Basically, spray too close, about 3"-8". Notice how the
glued down rock areas did not erode in the same way. That works
fine for my mineral vein idea, but it illustrates that glued together
foam can create problem areas, e.g. with multi-tiered hills.
3. Now that you've done the damage, seal the piece up with glue
or paint. I simply painted on dilute glue for the sample show below.
For the other rocks, I simply went straight to spray on black Latex
paint. Because of the nooks and crannies, a spray paint works better,
so sealing it or using a less aggressive system like spray on latex
paint is best. The ideal approach is to seal with glue first, then
it does not matter what kind of spray paint you are using. It would
not hurt to paint the bottom with rush on Latex at this point.
4. If the rock is not black yet, paint it black.
5. Highlight by dry brushing with Delta Ceramcoat Storm Grey and
then Delta Ceramcoat Rain Grey. Do both highlights, trust me. It
makes a big difference. With a little practice, you can do this
step with the 1" brush as well, which greatly speeds things
up. Be sure and rinse the brush after every one or two hills to
prevent damage to the brush. You will want to dry the water from
the brush pretty thoroughly before doing more dry brushing. By
the time you dry brush two hills, wash the brush, and dry the brush,
you can go right back to the same hills and do the second highlight;
it will be dry enough. Here's a before and after so you can see
the stark difference highlighting makes.
Note: the pictures below look a lot brighter than real life.
There is also a distortion because the spray on black latex had
a satin finish, so the recesses are shinier than the highlights.
|
|
|
|
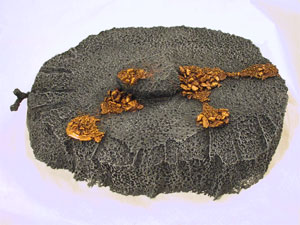 Here I have painted the rocks with
Citadel Colour Beaten Copper, washed with Delta Ceramcoat
Black, then highlighted with Citadel Colour Shining Gold.
Then I painted white glue around the base and immersed
it in white sand to base it.
 |
6. I use a standardized sealing approach - 3 layers of gloss followed
by one layer of matte. For more detail see my page
on sealers. (Note: Because terrain is so big, I tried to save
money and tested Krylon Matte Finish instead of Testor's Dullcote,
but it was not matte enough. Stick with the Testor's Dullcote).
 |
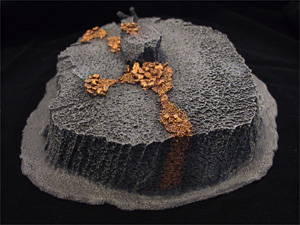 |
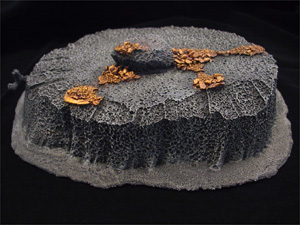
I painted the sand
with the same color scheme as the rocks then sealed it.
|
|
|
