Battle Report 16 - Plains of Blood
Tyranids vs. Ulthwé Eldar
Composed by Michael J. Casavant (Hive Fleet Phage)
Summary
- Date - 13JAN2002
- Points - 1500
- Scenario - Ambush
- Hive Fleet Phage, Tyranid Army List
played by Michael J. Casavant]
- Ulthwé Eldar Army List
[played by Cliff Maxwell]
- Result - Massacre in favor of the Tyranids
- Losses, Phage ( total) - Hormagaunts 1/2 strength (85),
Gargoyles 1/2 strength (40), Spinegaunt one brood 1/2 strength
x 2 (130).
- Losses, Ulthwé Eldar (1700): No survivors.
- Grand Tournament Scale (Victory Points Difference) - 1445
= Massacre in favor of Tyranids.
- 0-299 Victory Points = Draw - neither side holds the
upper hand.
- 300-599 Victory Points = Minor Victory - You have won
the battle, but only just!
- 600-1,199 Victory Points = Solid Victory - You have decisively
defeated your foe!
- 1,200+ Victory Points = Massacre - You have ruthlessly
crushed your foes!
Report
Intro
This is my fourth experience with the basic method of mission
selection from the rule book and I still like it. This was the
third of three games played on one long day. The other two were
batrep 14 and batrep
15. Again, this one I was playing the Attacker in a Raid against
Ulthwé Eldar. Fearing the might of a Seer Council, I took
Psychic Scream for my flying Hive Tyrant, instead of Warp Blast,
and I added Poison Spore Mines to the options for my Biovores,
because of the prevalence of Sv 4+ and Sv 5+ in the Eldar lists.
Setup
Naming convention: The food that have faced Hive Fleet Phage
have named the Hive Tyrants that continue to plague them. The
one that trudges forward implacably with an escort of Tyrant Guard
they call "Thunder." The swift winged beast that races
across the battlefield and shatters bodies and vehicles alike
has been dubbed "Lightning." They have also named the
Carnifex engine of destruction, "Mjolnir."
|
|
|
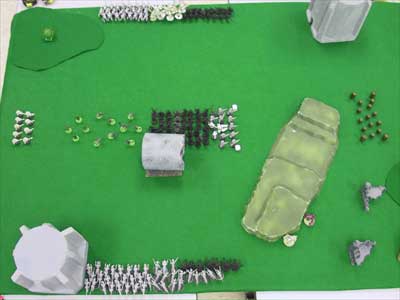
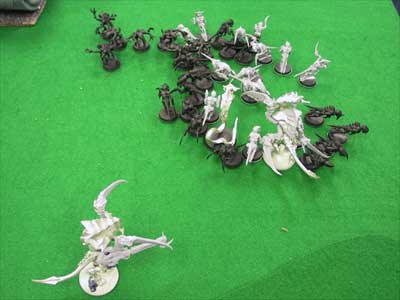
OK, here's the setup.
Near side - Spinegaunts, Hormagaunts, Genestealers.
Far side - Spinegaunts, Gargoyles, Lysogaunts.
Far Right - Barrels delineating a minefield.
Bottom right (just behind the hill) - Biovores.
Reserves - Thunder, Lightning, Warriors, and Red Terror.
Yes ALL of my synapse is in Reserve. :b
|
The Battle
|
|
|
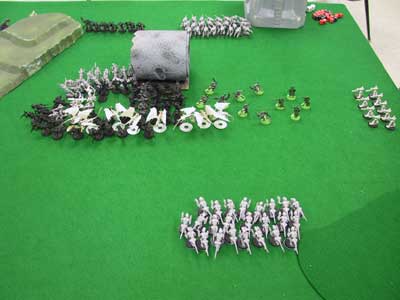
Turn 1 - The Gargoyles, Hormagaunts, and Lysogaunts rush
forward and assault all of the Guardians, the Seer Council,
and a few Striking Scorpions. If you can, always attack
Striking Scorpions first. They are even tougher when they
charge.
The Spinegaunts on the far side of the table failed their
Instinctive Behavior roll, but the result was "Attack!"
so they advanced 2d6" towards the nearest enemy. I
rolled an impressive snake eyes for 2" of movement.
Still, it was better than losing them immediately in a Fall
Back.
Note: Cliff was sporting enough to remind me to roll on
the table instead of just pulling them off. Yay Cliff! :)
|
|
|
|
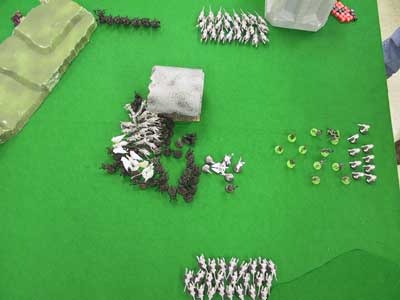
Turn 1 (end) - The Eldar fought hard, but their Striking
Scorpions and some Guardians fell back.
|
|
|
|
Turn 2 (first half) - The rest of the Eldar units in the
fight fall back and are run down in advances. Leaving the
Striking Scorpions and Dark Reapers.
Reserves - Thunder and the Red Terror make it on the board.
|
Turn 2 (second half) - The Eldar all jump into the fight.
|
|
|
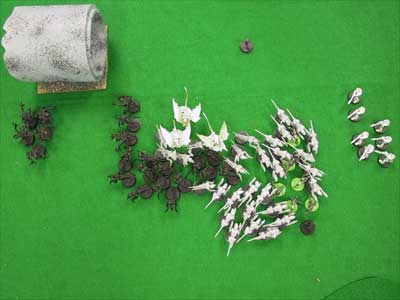
Turn 3 (first half) - The Red Terror and Lightning make
it into the assault and the Tyranids kill off the rest of
the Eldar.
Reserve - Lightning entered and was able to get into the
assault this same turn. The Warriors arrived but were too
far away and too slow to affect this turn.
|
Wrap-up
Ambush is pretty good for assaulting armies, but you have to
be careful. You have to roll 3+ for each unit to get them at the
start. I made sure to take three units that could immediately
engage, given the chance. On average, I should get two, I lucked
out and got all three.
Also, I was reasonably well prepared to deal with vehicles and
I think that is necessary because it would not be surprising to
see a number of vehicles in a list for Raid Defender if they had
Ambush prominently in their mind.
Cliff fought hard, but I think Tyranids have a distinct advantage
as an Attacker in Ambush, at least with the lists we were using.
Lessons Learned (and relearned)
- Biovores were not all that useful. In general for a Raid Attacker,
a Carnifex or more Hormagaunts would have been better. Note:
I am not advising this for a general list, but for a Raid Attacker
list.
Tactics Developed
- Most of my tactical decisions came in designing my list as
noted already. Once the game started I pretty much ran straight
at him and fought.
- I was a little bit crafty engaging just one Striking Scorpion
with a Gargoyle as they assaulted Guardians. That tied up the
Striking Scorpions so that they could not get the benefit of
charging, but I engaged a minimum amount because they are pretty
dangerous and I did not want my Gargoyles to get killed prematurely.
Bugs should die only when the Hive Mind tells them too. :)
Rules Questions & Clarifications
- In Drawn Combats the 6" move is a normal move and although
you may ignore Difficult Terrain, as stated, you must go around
the enemy models, not through or over them.
|
