Assembly Notes: Biovores
Use Pictures!
You should look up pictures of the model in the Tyranid Codex
as well as keep the box the model came in close by. The picture
on the cover of the box and the pictures in the Codex will
help guide you as to the intended posture and appearance,
which can be very helpful, even if you want to convert the
model. The Biovore comes in a blister, so there is no picture
there, but there is a very good picture in the Codex that
shows a side view which gives you a good idea what angle the
back legs need to be at.
Some General Comments
These notes relate what happened with assembly of my first
Biovore. I found it to be more awkward than the other models
I assembled. Even the Hive Tyrant
and Carnifex seemed easier. I think
the number of supporting limbs is the real clincher. Rather
than worry overlong about precision matching and levelling,
I decided to use putty on the base. Putty helps achieve the
sandy base look that I want, but it also covers up slight
differences in height and provides another level of structure
and support for the model. Be very careful to test out the
parts and carefully pin them. Moreso than any other model,
I was ready for anything with this one. I had a reasonably
clear work area and all of my supplies (including putty supplies)
at the ready.
Materials
|
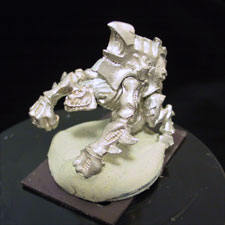
Procedure For Biovore #1 - Stationary, Launching
- Clean all of the flash off of the pieces.
- Play around with the model, loosely assembling it to get
a feel for how it will go together. Pay special attention
to the angles of the limbs with respect to the body.
- Prepare all of the joints and the feet for Pinning.
| On this particular
Biovore, I was cavalier and tried to drive a single
pin through the hips for both legs; that was somewhat
time consuming in the end, as the drill emerged just
slightly off on the opposite side and the right hip
became more difficult to pin properly. This is probably
more work than it is worth. I would recommend drilling
a short hole for each hip joint. |
 |
| On Biovore
#2 I took my own advice and drilled a shallow hole from
each side, rather than trying to drill one hole all
the way through. |
|
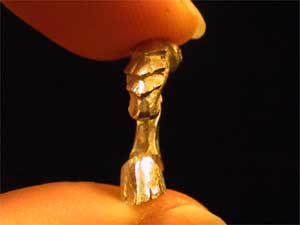
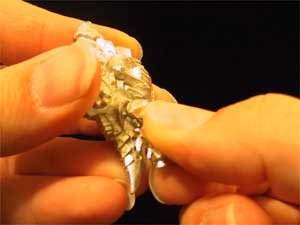
- Glue on the left leg
| Here I have
glued the left leg onto the pin and, using the picture
in the codex as a guide, I have adjusted the leg angle
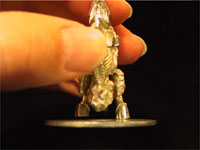
to a reasonable angle. This is an important point as
the Biovore will barely fit on the base as it is and
if the limbs are splayed apart too far, you will not
be able to fit it on the base. |
 |
- Wait for the glue to cure, at least 15-60 minutes.
Note: at this point I was having some trouble getting both
feet flush without the body leaning to one side. The left
leg position was good, so I decided to secure the model to
the base before moving on.
- Glue a pin into bottom of left foot
- Position Biovore on the washer and mark drill point for
left foot pin
- Drill hole for left foot in washer.
- Adjust the hole until the pin can be slid in easily but
still be somewhat snug fitting.
- Clip the pin short enough so that it will not stick out
below the washer.
- Affix the left foot to the washer.
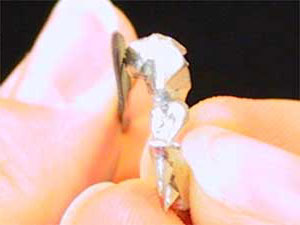
- Glue/pin the right leg in place.
| Notice the
gap at the bottom of the right foot. This is part of
the reason that I moved on to this step. This is still
surprisingly structurally stable, but I want to get
something under that foot as soon as possible, so I
am moving onto the putty. |
 |
- I mixed up some putty and colllected my supplies for making
the base.
| I will use
a double ball stylus (see image at right) as well as
some other random putty tools (not shown). The ceramic
palette is just there to hold the putty and some water.
The water bottle is kept handy to apply water as needed
to the putty. Note: I use water from my Pur water filter. |
 |
- Secure the model for working.
| I
needed to support the model while working. I superglued
a magnet to an empty jelly jar and this held the washer
base quite securely. Note that with steel sculpting
tools, your toll will want to stick to the washer edge.
I exploited this to my advantage for cleaning/smoothing
the edges, but it can be startling the first time it
happens and you might prefer to secure the model with
double-sided tape or something else non-magnetic. |
|
- I start by mashing most of the putty into a thin layer to
cover the bulk of the washer, especially the hole in the middle.
Then I focus on filling the gap under the right foot. From
there, I just build up the putty. For my Tyranid army, I plan
to have sand as the base terrain, so I slightly build up the
putty around the feet as if the feet are buried slightly in
the sand.
| |
|
|
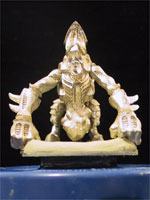
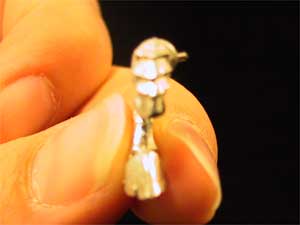
| Here
are some various shots of the finished base. |
- Wait for the puty to harden (four hours from start of mixing
is good for Milliputt).
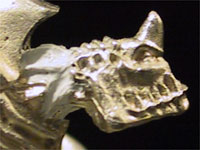
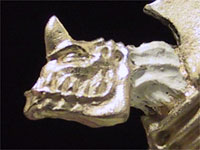
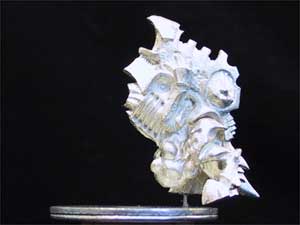
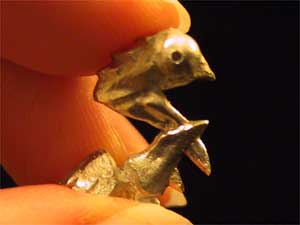
- Attach the head.
- I was not happy with how poorly the head fit in the neck
slot and I decided I would use putty anyway, so I went ahead
and exploited the pinning technique to have him look off to
the side.
| Notice the
gap in the neck. I plan to fill this with putty. |
 |
- I used Kneadatite Blue-White Epoxy Resin Putty. This was
my first experience with it. I liked it. I built upon and
tried to follow the folds already present.
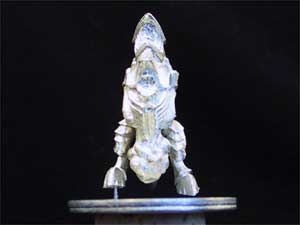
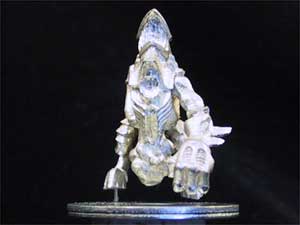
- I had an idea for a simple conversion, a spore mine launching
out of the Biovore. That is included on a separate
page.
|
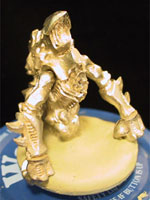
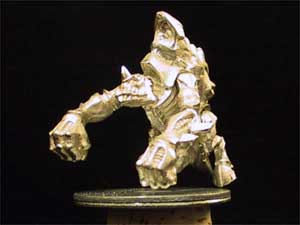
Procedure For Biovore #2 - Walking
- Clean all of the flash off of the pieces.
- Play around with the model, loosely assembling it to get
a feel for how it will go together. Pay special attention
to the angles of the limbs with respect to the body.
- Prepare all of the joints and the feet for pinning.
You may recognize most of the following pictures from the
Pinning page.
 |
| Starting with
right leg. |
 |
| File a flat
spot for drilling |
 |
| Drill a hole
in the hip for a pin |
| |
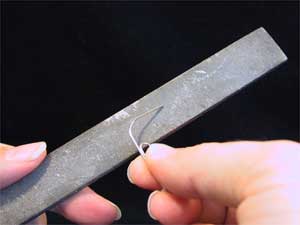
| Prepare
a pin by cutting it and filing the tips smooth. |
 |
| Insert the
pin in the hip. |
 |
| Press the
leg and pin into the hip joint of the body. |
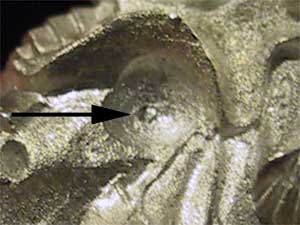 |
| This will
create a mark that indicates where to drill. |
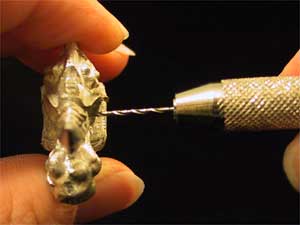 |
| Drill a hole
in the hip joint of the body for pinning. I recommend
drilling each hole individually, rather than drilling
one hole straight through. |
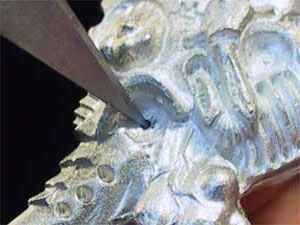 |
| After drilling,
clean up the hole edge wth the tip of a knife. |
- Repeat this process with the left leg as well.
- Glue and pin the right leg to the body, using 5-minute epoxy.
- Wait 15-60 minutes for the glue to cure.
- Glue and pin the right foot to the washer base.
- Glue and pin the left leg on. I swiveled the left leg backwards
a little to support the notion of walking, but not so far
that it would not be supported after the putty was added to
the base.
- Glue and pin left arm in place. I left the arm down in a
supporting position.
- Glue and pin right arm in place.
- I mixed up some putty and colllected my supplies for making
the base.
- Secure the model for working. I used a magnet on top of
a large jelly jar (empty).
- I start by mashing most of the putty into a thin layer to
cover the bulk of the washer, especially the hole in the middle.
Then I focus on filling the gap under the right foot. From
there, I just build up the putty. For my Tyranid army, I plan
to have sand as the base terrain, so I slightly build up the
putty around the feet as if the feet are buried slightly in
the sand.
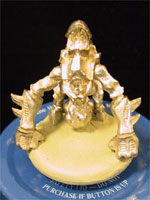
- For this Biovore, I did not submerge the left foot too much,
and I left the right arm suspended in air to support the picture
of motion.
- Wait for the puty to harden (four hours from start of mixing
is good for Milliputt).
- I then filled the neck gap with Kneadatite Blue-White putty
as with the first Biovore, above.
|
|