|
Method #1
Materials
Pre-assembly
Remove all flash and scrub the parts clean with dish
soap and water.
Note: You can substitute epoxy resin putty or your favorite
adhesive for "glue" as you see fit.
A. Assembling the legs and pelvis
I like to use pins, putty, and superglues to assemble these
pieces. See the Pinning
for the technique.
- Pin the feet to the base and the legs to the pelvis.
- Test the pin lengths and insure that they are the
proper length and orientation.
- Superglue pins in the feet and legs.
- Grip a pin with smooth needle nose pliers.
- Apply some superglue (gel or liquid) to the tip
of the pin
- Insert the pin into the leg (or foot) and let
it dry.
- Repeat until both feet and legs have pins secured
in them.
- Prepare a pea-sized ball of putty.
- Place a tiny ball of putty in the socket of one leg,
pressing it down so that the pin pokes through.
- Apply some superglue to the tip of the pin.
- Insert the pin into the hip of the pelvis and press
it into the proper orientation
- Hold the position until the initial curing is finished
(15-60 seconds).
- Repeat with the other leg.
- Trim away excess putty.
- Smooth/sculpt putty as needed.
- Wait for putty to cure.
B. Assembling the Torso and Pelvis
I strongly recommend that you fill the torso with epoxy
resin putty for this joint. You can mask the gaps and
it will also be a very strong bond.
- Matche the backplate and chest piece together to get
an idea of the amount of gap to fiill.
- Mix a small amount of putty, enough to make a large
pea-sized ball of putty for each torso you plan to assemble.
- Depending on the putty you use, you might want to
wait for it to cure for 10 or 15 minutes until it gets
a little bit more rubbery, that's how long I would wait
for Milliput Standard Yellow/Gray.
- Press the putty into the center interior of the backplate
and spread it out a little to the sides where it will
match to the chest piece.
- Mash them together very hard with your hands. The
excess putty should squeeze out. If it does not, pull
them apart, pull the putty back out, make a larger ball
and try again.
- Trim the excess gently with a knife and double ball
stylus. The final tool used on a surface should be the
double ball stylus. You will need to use water to get
a smooth finish on the putty, but very little water.
I alternate back and forth between the two ball sizes
as needed.
- Use the stylus to ride the fold of the neck into the
putty to create smooth transitions from the metal pieces
to the putty and create neck folds. I start with the
large ball and move to the smaller ball. If the putty
is too soft, you might want to let it cure for 5 or
10 minutes and try again. Don't forget to re-moisten
the stylus with water as you go to keep the putty from
sticking to it. However, remember that too much water
will turn the putty into a useless mush.
- Repeat the same process with the pelvis.
 |
 |
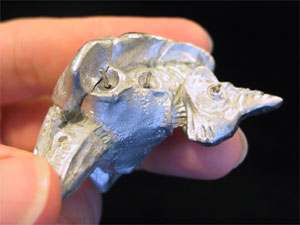
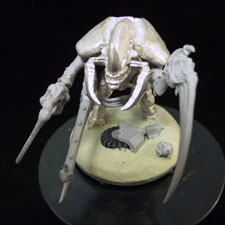
| Compare the original
folds sculpted into the back with those I created
with putty. I am no sculptor, this was pretty easy
to do. You just need patience. |
C. Put pins in the hips and feet
Because the torso is so heavy and it is leaning forward such
that it's center of mass is not over the pelvis, I decided
to use a pin for strucural integrity. See my page
on pinning. I put pins in both hip knobs and drilled appropriate
holes in the hips of the legs. I also put pins into the feet.
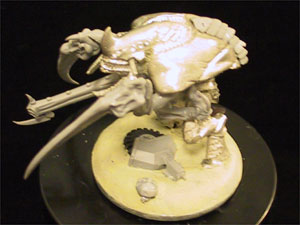
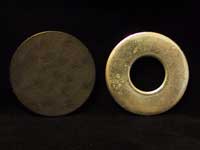
D. Prepare the base
I used a washer for my base because I
use magnets to secure my minis and the Carnifex is
a large heavy miniature with a center of mass poorly balanced
in front of its body. The plastic base was too thin and
weak to hold a pin well enough for my tastes. So I went
to the same place that I bought my 1" diameter washers
and picked up an appropriate-sized washer.
What is an appropriate size? The "official"
GW base is 60 mm in diameter. Unfortunately, I could not
get metric sizes at my local store. I had a choice of
slightly smaller or larger. I chose slightly smaller because
if someone gets picky I can always play as though the
base is a hair larger, but it's pretty hard to trim a
solid steel washer down in the middle of a game. The washer
I use is 57.5 mm in diameter.
Pour a little paint onto your palette, preferably a dark
one. Loosely assemble the Carnifex and align the legs
properly. Hold it over the washer and decide on the orientation
you will finally want. Dip the foot pins into the paint
and touch them to the washer in the desired orientation.
You should now have spots marked where the foot pins will
go. Wash off the feet.
Drill holes in the washer where you marked it. Test the
pins and adjust as needed until the pins can be inserted
reasonably easily.
E. Attaching Body to the Legs and Base
OK, by now you should have pins in the hips and feet
and appropriate holes in the washer and legs. Grab a ball
stylus, pin, and/or whatever you like to use to work
with putty in small areas. Mix up some epoxy resin putty
(I use Milliput), a pea-sized ball is adequate. You
should have tested all of the pin joints and their fitting
by now, do not bypass this, you will regret it.
Note: you do not need to use putty at this stage. You
can just use superglue.
|
There are so many ways to adhere objects together. In
this particular case, I used putty, aided by superglue.
In the long run, I have found 5-minute epoxy works best
overall for a strong hold and if used properly it can
be exploited for tiny gap filling of joints that are joined
with epoxy.
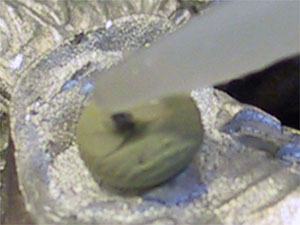
Press a small ball of putty over
the pin and using a tool or even your fingernail, press
it down so that the pin sticks out a little bit.
If you are not using putty,
then move on to the next step.
|
 |
|
Apply some cyanoacrylate
glue, e.g. superglue to the pin. Superglue can accelerate
the curing of putty, so be careful.
Now you should press the
leg mostly into place and position it properly.
To facilitate this, I then apply superglue to the
foot pins and insert them into the washer.
|
 |
|
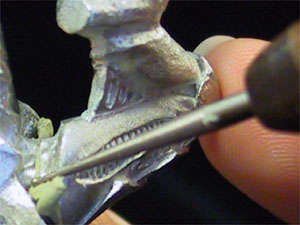
At this stage, if you are
using putty, then position the torso and legs in
their final position, squeeze them into place and
trim away the excess putty. Keep the stylus moist
as you work. You can put down some superglue to
accelrate curing. Press and hold for a few minutes.
If you are just using superglue,
you can use a trick of sorts. Rotate the torso slightly
forward, this pushes the hip joints open and you
can apply some more superglue. Then rotate the torso
back into its proper position to close the joints
once again. Press and hold for a few minutes.
|
 |
|
Now I just hang the carnifex
upside down by its washer. I hang it off my light
with another washer to keep it in place. I showed
the sprue and wooden post setup as a possible alternative.
This may not be a necessary step, but the way the
hip joints respond to rotation of the torso, I think
this is less likely to allow sagging of the torso,
as compared to a standing position, to compromise
the hip joints. After about 30-60 minutes, it should
be plenty good to go. Luckily, gluing the feet in
at the same time makes this whole process much more
likely to work right without difficulty.
I cannot say this is the
best method, just the method I tried, and it worked.
|
 |
 |
F. Attaching the Mandible
I just superglued these in place. If they come off I
can always repair them or reinforce them. Until then,
I will just try and resist the urge to hold him by his
mandibles <grin>.
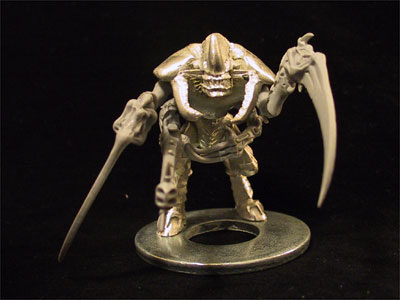
G. Attaching the Arms
This part is pretty easy, jsut pick the arms you like,
drill holes, and glue them to the pins. My advice is to
decide on the positions of all of the limbs before gluing
any of them, especially if you have a gun. That gun eats
up a lot of space and gets in the way. Drilling the limbs
to exactly match a desired arm position can be a real
pain, so alternatively, you can use 5-minute epoxy, which
I did with my second Carnifex.
|