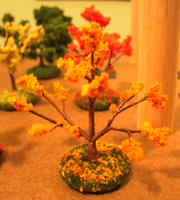
|
Trees are vital to an aesthetically pleasing and tactically challenging
wargaming table. Here I show how I made some trees. I tried some methods
from some simple and cheap (mostly free) materials, but my preference
is to just use the Woodland Scenics tree-making materials. These trees
are designed with two uses in mind: as props for role-playing games and
terrain for miniatures warfare games, such as Games Workshop's Sci-Fi
minis game, Warhammer 40,000 (WH40k), and their Fantasy minis game, Warhammer.
Philosophical point: I like being able to relocate trees to accommodate
movement of miniatures and also to facilitate placing trees on a hill
or other feature to make it wooded. So I am making what are called movable
trees as opposed to static trees that are permanently affixed to a terrain
piece/base.
- Woodland Scenics Trees
- Putting "Christmas village" Alpine trees (bristle trees)
to good use
WARNING: You should not attempt these procedures without an adult present.
Making Woodland Scenics Trees
Materials
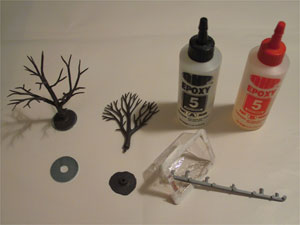
- A tree-making kit from Woodland Scenics, which includes:
- Tree Armatures w/ bases (soft wood-textured plastic over
wire)
- Clump Foliage
- Hob-E-Tac (a very tacky and durable white glue)
- 5-minute epoxy
- Some form of spray adhesive (WS Scenic Cement or Spray On Elmer's)
- Appropriate flock (and rocks if you like) for the base (I used
mostly WS "Green Blend" Blended Turf)
- Spray Primer
- Brown Spray Paint (I don't advocate spray paint, but with the
trees it is much easier for the basecoat)
- Metal-bottom base (one for every tree) - here's
how I make those
- Craft paints (for highlighting and small stuff)
- Delta Ceramcoat ?
- Delta Ceramcoat ?
|
Procedure For a Full Deciduous Tree (see below for fall trees)
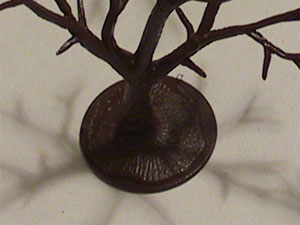
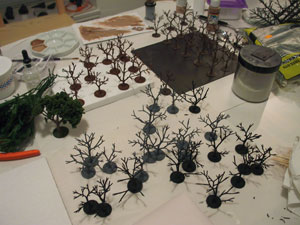
- First, I use 5-minute epoxy to secure the trees to their bases
and glue a metal-bottom base to the tree base.
Mass assembly notes: I found I could
reliably/safely apply epoxy to about 6 trees/bases
before it began to become unworkable. Once
the epoxy starts to trail long tenacious strands,
it's time to start mixing a new batch.
- Then I bend the branches so that they look somewhat natural.
At the very least, I try to twist/bend every branch so that it
is not coplanar with adjacent branches.
Mass assembly notes: Since there is
no time-sensitive component in this step, perform
it for your whole batch of trees.
- Spray the trees with primer. Spray on is just easier to use
with the trees.
Mass assembly notes: Since there is
no time-sensitive component in this step, perform
it for your whole batch of trees. Of course,
spray in manageable batches. I would lay out
about 30 at a time, but it depends on your
work space and your spray technique.
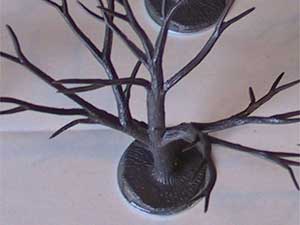
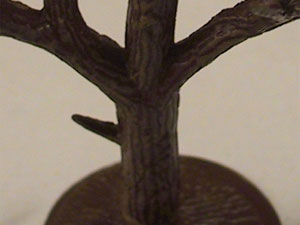
[This picture shows one of my first trees, with just a simple washer
as a base. That was found to be inadequate in diameter, mass, and ease
of picking up.]
- Spray the trees with a brown basecoat. Spray on is just easier
to use with the trees. For normal brown trees, I tried the two
cheap spray-on brown paints that I could readily find, Gloss
Leather Brown and Rustoleum Red Primer (honestly, it's more brown
than red). I will seal it later so the finish is not important.
You could use spray on Latex, but it will cost two to three times
as much and will still result in a satin finish (usually). I
like the Red Primer best.
Mass assembly notes: Since there is
no time-sensitive component in this step, perform
it for your whole batch of trees. Of course,
spray in manageable batches. I would lay out
about 30 at a time, but it depends on your
work space and your spray technique.
Note: don't rule out odd variations on a
theme such as grey trees, blackened/burnt trees,
blood red trees (probably due to magic), etc.
- Highlight the wood texture; for my brown trees I used Delta
Ceramcoat Light Chocolate and then Delta Ceramcoat Toffee.
Mass assembly notes: Since there is
no time-sensitive component in this step, perform
it for your whole batch of trees.
- Apply clump foliage to branches using Hob-E-Tac glue (this
is more of an art than a science).
- Fluff and/or pull apart your clump foliage as necessary
- Apply Hob-E-Tac glue to the portions of the branch where
you want foliage. Do not glop on more than you need.
- WAIT 15 MINUTES The Hob-E-Tac instructions say this,
but the Tree kits fail to mention it. It is very important.
If you do not wait long enough, you will succeed in making
a mess and gluing a lot of foliage to itself.
- Vigorously dip the tree into the foliage, as in press
it slightly into the foliage to get a good adhesion. After
you pull it out, press the foliage down onto the tree to
further improve adhesion.
Mass assembly note, cluster technique: Apply
Hob-e-tac to trees until 20 minutes
pass (just to be safe), let's assume
you can reliably apply glue to 12 trees
in that time. Foliate half of the trees;
in this case, 6. Apply glue to another
6 trees, given the 6 unfoliated trees
time to set. Then foliate the "older" set
of 6 unfoliated, and repeat. Keep an
eye on the time and be sure to pause
and/or slow down if your trees are
not getting at least 15 minutes for
the glue to set.
Mass assembly note, queue technique: Apply Hob-e-tac to trees
until 20 minutes pass (just to be safe), let's assume you can reliably
apply glue to 12 trees in that time. Now, go back and foliate tree
#1, then apply glue to a new tree (tree #13), then foliate tree
#2, and so on. Keep an eye on the time and be sure to pause and/or
slow down if your trees are not getting at least 15 minutes for
the glue to set.
- Let the foliage dry overnight.
Mass assembly note: Of course, this is not a problem
with many trees. Use the time that you foliated your last tree
as your metric of when you finished.
- Flock the base of the tree
- Paint white glue on the base
- Dip the base in Woodland Scenics Blended Turf
Mass Assembly Note: You should be able to work
through all of your trees, one-at-a-time, to completion.
- Let dry for a few hours
Mass assembly note: Of course, this is not a problem
with many trees. Use the time that you foliated your last tree
as your metric of when you finished.
- Spray Woodland Scenics Scenic Cement on foliage. Apply small
amount of turf as desired to create texture and vary the color.
I have used Blended Turf for normal trees, Fine Burnt Grass for
trees starting to turn at the start of fall, etc.
[Note: I keep canned air handy to blow off stray bits of flock that
might get on the trunk]
Mass Assembly Note: You should be able
to work through all of your trees, one-at-a-time,
to completion. You will have to take occasional
breaks to refill the sprayer with Scenic Cement.
- Let dry overnight.
Tip/Trick: They may be dripping Scenic Cement. I recommend
placing them on a surface that you can easily liberate them
from, such as rigid plastic (I used a scrap piece from an old
plasticore sign). Also, I simply shuffle them about after 20-30
minutes to help prevent the trees from being glued securely
to the sheet. For excessive cement, you might consider wiping
the bottom of the base with a wet sponge before setting it
down to dry.
- Seal foliage and base with Woodland Scenics Scenic Cement & Sprayer.
Mass Assembly Note: See step #10.
- Let dry overnight.
Tip/Trick: see step #11.
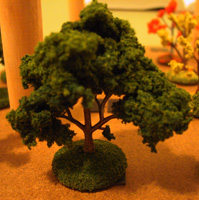
The result should be some rock hard, realistic-looking trees (the
one on the right had more fine burnt grass added for a subtly drier
look).
What to do differently for Fall Trees.
Basically, the same approach as above, but in step 6, be very
careful where you put the hobby tack and instead of clump foliage,
use coarse turf in fall colors.
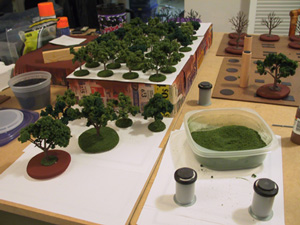
Mass Assembly!
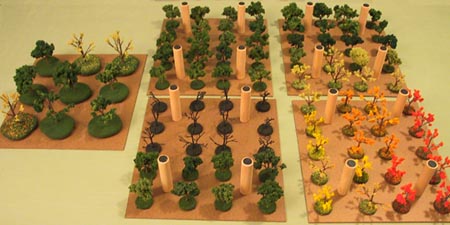
I cranked out over a hundred trees for myself and the Rice University
gaming club in preparation for OwlCon XXII. This picture does not
show the Alpine trees I snazzed up as well (see the technique below).
|
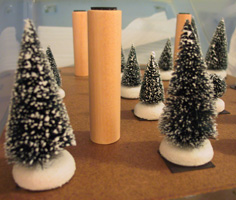
Some Quickie Alpine Trees
I bought some Lemax Christmas Village plateaus, which came with free
cheapo flocked bristle trees. I decided to make some custom foam-washer
bases for them, flock them with Woodland Scenics Snow (& seal with
Scenic Cement) twice, then glue the trees to the bases with 5-minute
epoxy. Here's the result
|
